It has been a couple of weeks since my last post and tutorial, as I was lucky enough to be enjoying the beauty of Austria with James. So, in order to make up for my short disappearance, I have chosen a rather challenging manicure to show you all.
I have named this one the Swarovski Water Marble Manicure. The 'Water Marbling' part is pretty self explanatory as I will be using water to create a marbled effect. The 'Swarovski' part refers to the beautiful crystals I will be adding to each nail. Whilst in Austria, we visited the stunning Swarovski Crystal World, where I purchased two packs of crystals; a beautiful deep indigo colour and a light grey opal colour.
WORDS OF WARNING: This is a challenge! Do not attempt it if you only have 15 minutes to spare. This manicure requires patience, practice and resilience.
Water marbling is a technique where one drops droplets of nail varnish into a container of water. This droplet spreads out to make a circle. One then proceeds to drop various other colours into the water, creating a bullseye. Using a toothpick, one then creates a pattern in the water, and when the nail is dipped into the container, the pattern transfers onto the fingernail.
Additionally, it is appropriate for me to mention that not all nail varnishes work for this technique, which can be very frustrating. I have found that it is best to use nail varnishes of the same brand, and preferably ones which are not too old.
The products I will be using for this tutorial are the following:
- China Glaze's First and Last: I used this multi-tasking nail varnish as both my base and top coat
- OPI's Don't Pretzel My Buttons
- OPI's Ink
- A toothpick
- Cotton buds
- A glass of bottled or filtered water at room temperature
- Swarovski crystals: I used Opal and AB crystals
- Scotch tape or Sellotape
- An orange wood stick
- Nail varnish remover
Step 1: Paint your nails with a base coat. I tend to use China Glaze's First and Last as it dries very quickly.
Step 2: Paint on two coats of any coloured nail varnish. As I previously mentioned, I am using OPI's Ink, which is a beautiful blue/purple colour.
Step 3: Prepare all the equipment required, including: a toothpick, cotton buds, a glass of bottled or filtered water at room temperature, and some Scotch tape or Sellotape.
Step 4: Place Scotch tape or Sellotape around the outside of each nail. This will mean that the clean up process is a lot quicker and easier.
Step 5: Drop droplets of both colour nail varnishes into the water, one at a time, until you have roughly five or six rings.
Step 6: Using a toothpick, draw a design in the water. In order to create a flower petal style design, begin dragging the outside ring to the centre, and then complete this process as though the bullseye was a clock face - dragging the 12, 3, 6, and 9 to the centre, and then proceeding to drag the 1, 4, 7 and 10 to the centre.
Step 7: At an angle, push your finger into the water, so that the entire nail is submerged.
Step 8: Blow on the water's surface lightly, for about 10 seconds. This will ensure that the nail varnish on the surface dries.
Step 9: Using a cotton bud, wipe the surface of the water so that all the nail varnish is removed.
Step 10: Slowly lift your finger out of the water. You should be left with a unique design on your nail.
Step 11: Remove the tape, then use a cotton bud soaked in nail varnish remover to get rid of any excess nail varnish.
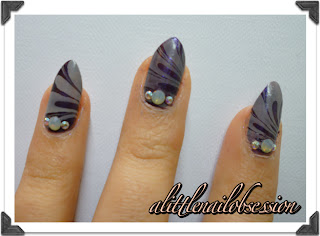
Step 12: Apply a small amount of top coat to the bottom of each nail, using a moist orange wood stick. Pick up one large crystal and place it in the centre, then pick up two smaller crystals and place them on either side.
NOTE: I would wait for a couple of hours before applying a top coat over the entire nail, as the design will smudge if it has not dried properly.
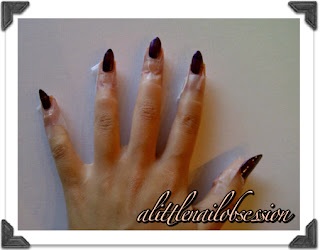
EXTRA: Pictured below are two different colour combinations and designs that you can recreate.
Voila, one beautiful Swarovski Water Marble manicure to go.
.JPG)
.JPG)
.JPG)